Welcome to the Superbly Administrator account. As an administrator you will have access to the the administation tab which will allow you to:
- Send Messages to Staff
- Adjust account settings
- Upload the class, teacher, and parent data
- Send account invitations to Staff and students
- Create awards lists
This quick start guide will walk you through the account set up and get you started by inviting Staff and students to the Superbly software.
1. Download Data
All Staff and students have to be invited to your school's Superbly account. Once invited they will receive an email with a link to set up their new password so they can access to their account.
The first step required is to upload the contact data to your account. There are 4 forms of data required:
- School Staff Contact Details
- Student Contact and Classes
- Parent Contact Details
- Class List, Subject and Faculty
These data sheets can be easily downloaded from your School Management System.
- Here is the Edval and Sentral download guide
- Here is an excel template for Edval (use this as a template for organising your data)
- Here is an excel template for Sentral (use this as a template for organising your data)
2. Upload Data
Once you have your data it is time to upload the data to the school account. This can be done every time there are new students of Staff (this can also be manually completed for individuals).
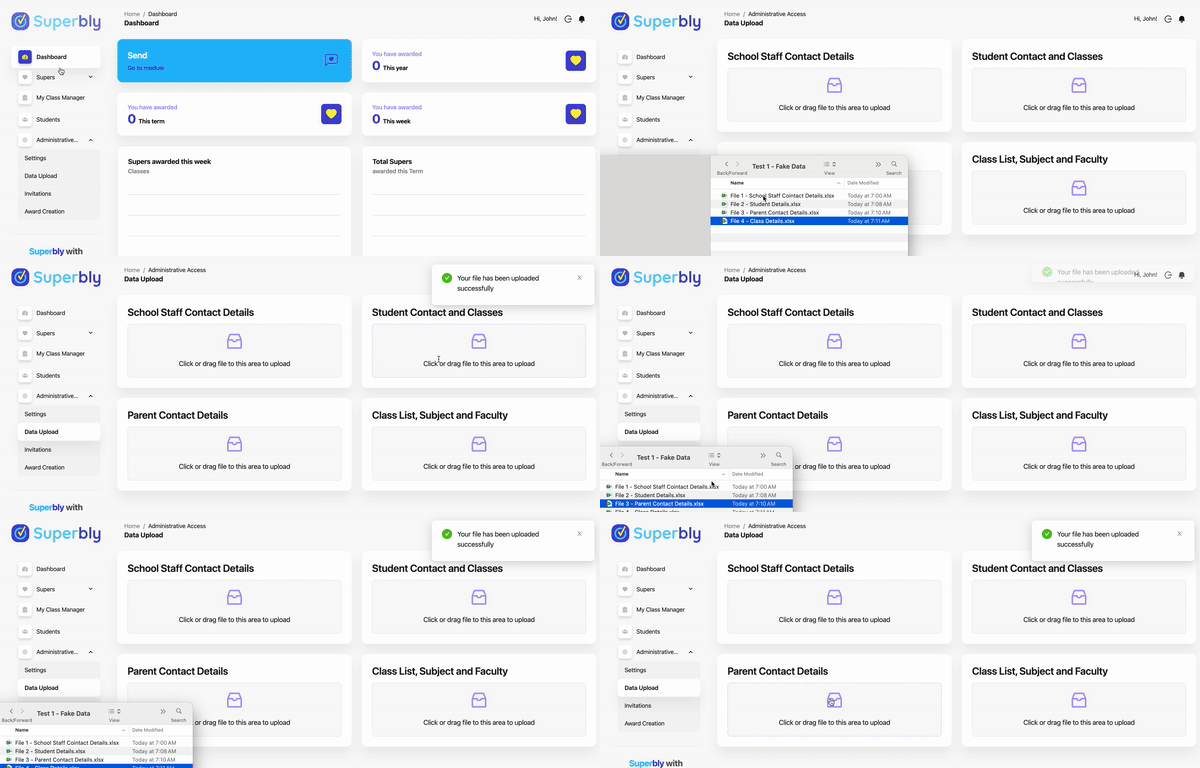
- Click on the administrative access tab to open the menus.
- Scroll down to Data Upload and click on the data upload button
- Click on one of the data upload buckets to open the file selection menu
- Navigate to the file you want to upload and select it, click open or double clicking on the file name (or drag and drop your files into each data upload bucket)
- The file is automatically uploaded to the account and you will recieve a message notifying you of the upload success
- Repeat this for the other files required
3. Invite Staff and Students
Once you have uploaded the 4 data files it's time to invite staff and students to join the school Superbly account. In the invitations tab you can invite staff and students to join by;
- selecting all - this is fast and often for the first time set up or if you have a new list
- individually - this is great is you have new staff or students
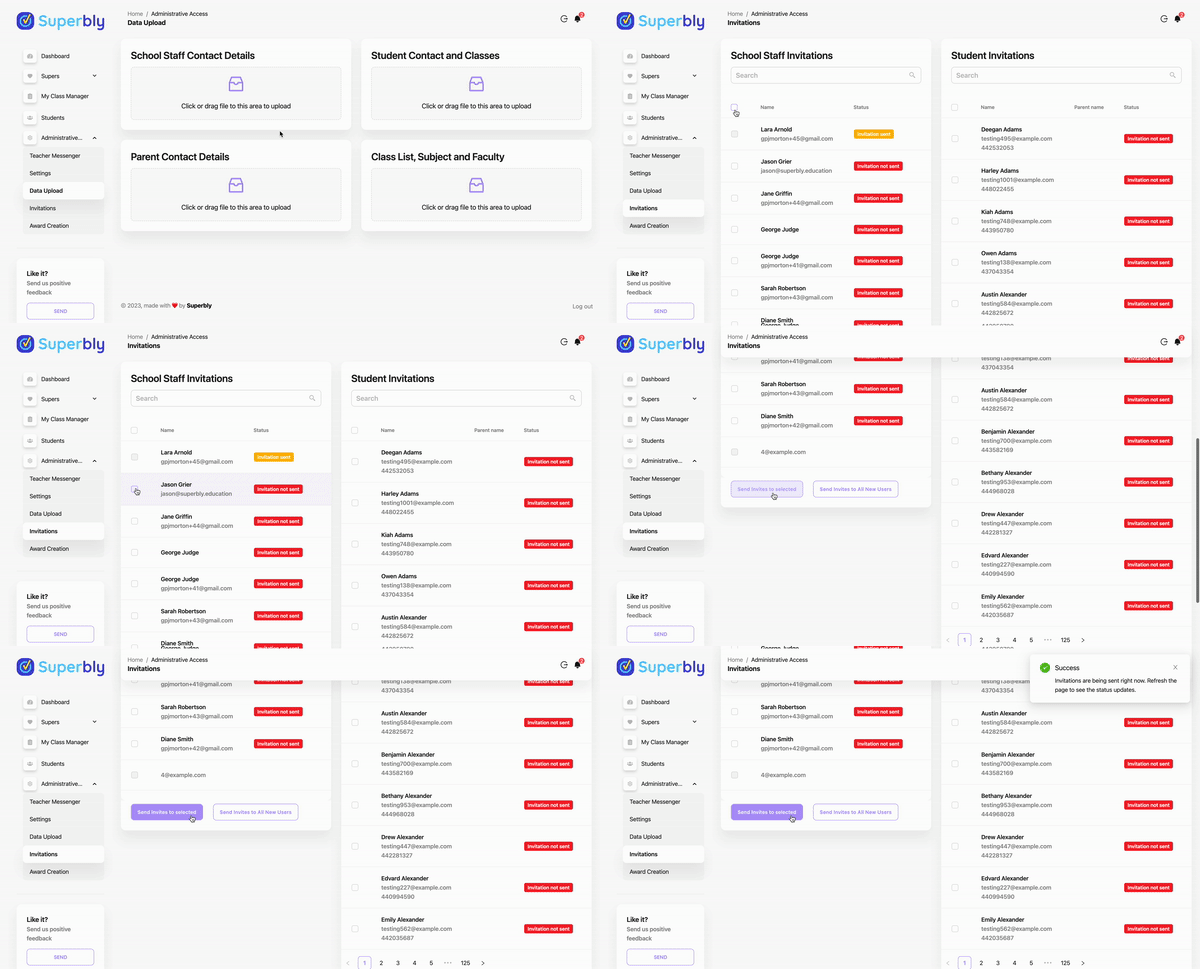
The status of the invitation is visible next to each staff or student name.
- "Invitation not sent" tag next to the name, invitations that have not been sent
- "Invitation sent" tag next to the name, invitations that have been sent
- "Invitation Accepted" tag next to the name, user has set up their account
- Click on the invitations tab
- Select all staff or students by clicking the tick box at the top next to "Name" Or scrolling to the bottom of the list and click the "Send invites to all new users" button
- Select individual staff by clicking the tick box next to the individual's name and scroll to the bottom of the list and click the "Send invites to selected" button
- The status next to the list or individual will change to "Invitation sent" and "Invitation Accepted" when the account is set up
- Repeat this process until all required staff or students have been invited
Congratulations 🎉 you now have set up all your staff and student to use the Superbly software
Related Articles:
Teacher Messenger
Award Creation


