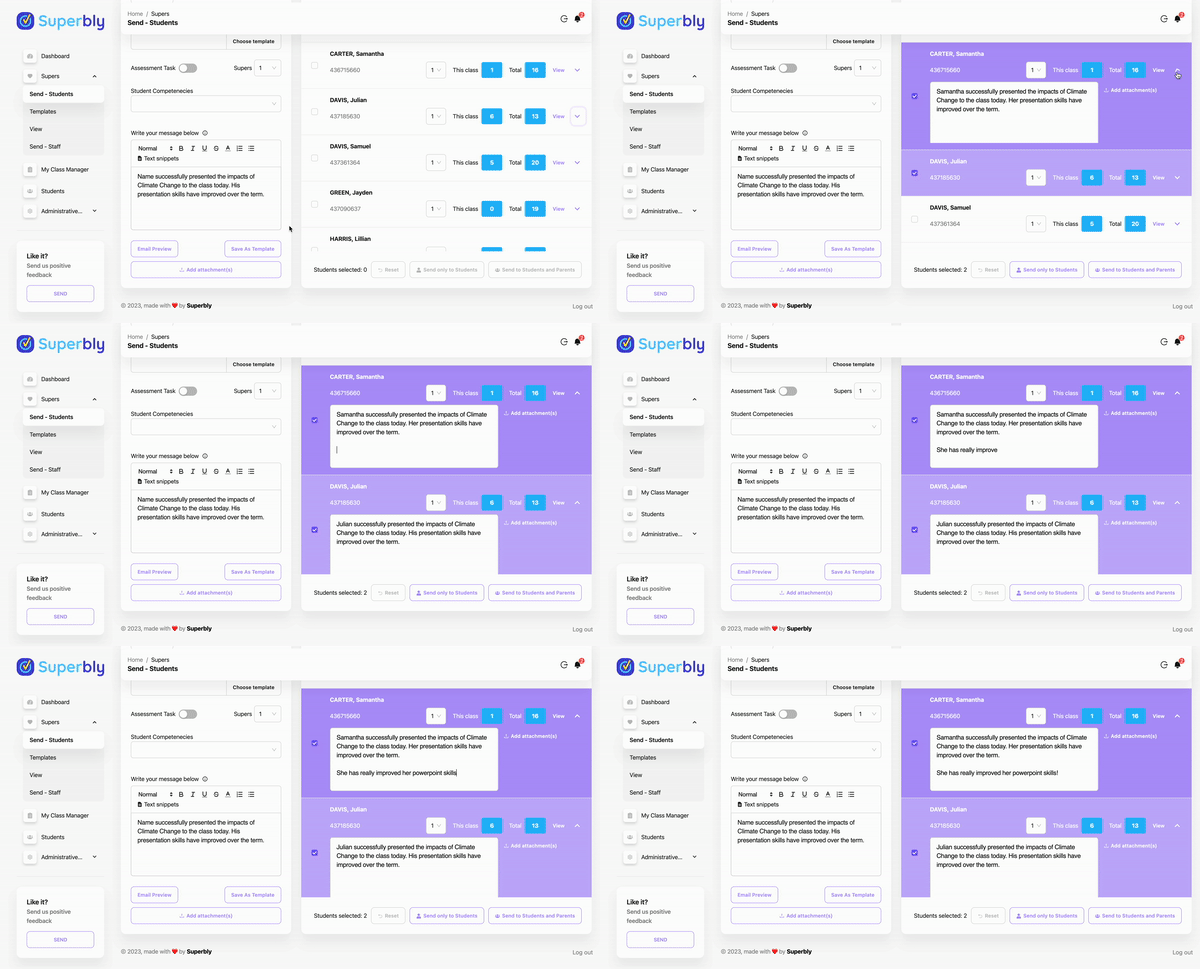
We have built a specialised text editor deisgned to make sending mass messages quick and easy. Names, genders, staff names and staff sign off are automatically integreated into the message by simply using the text snippets. Each message can also be save as a template if you use it a lot.
Creating a Message
Open the message tab, add the class, add the title, add the number of points
- The quickest way to write messages is to free write using the following rules:
- Instead of writing the student’s name (such as George) write → Name. (Example: Name did brilliantly today in Science.)
When tagging multiple students, their names will then be populated instead of Name.
- Instead of writing the student’s name (such as George) write → Name. (Example: Name did brilliantly today in Science.)
- When sending to multiple students (male and female) including gender pronouns - write in the masculine form (He, his, him).
- Example: Name did brilliantly today in Science, his presentation was fantastic.
- This will then automatically replace the male pronouns to female pronouns for female students.
- Alternatively - click on “Text Snippets” and insert the snippets for your message which will automate and personalise your message.
- Click on “Email Preview” to view what the final email to parents will look like
- Click “View” next to the student name on the right hand panel in the class list to see what the message for the specific student looks like. This can also be edited if you need to add an additional personal message
- After composing, you have the option to save messages as templates for future use
Note: the contact details of the parents, students and teacher names will all be auto inserted in each message and email
Text snippets are the bones of free writing! The fastest way to write a message is to write it in a male gender adding in Name, he, she, him, her and the software will do the rest.
Edit and Add Individual Content
Sometimes we want to add more detailed comments to one or more student while sending a class message to the rest of the class. This is easy:
- Select the students or entire class - write the generic message for all students
- Click on the drop down arrow icon found on the right hand side of the student name for the students you want to add additional content - this will open the individual student text field
- Type in any additional messages or correct any text alterations (for non-binary students change the he/she to they)
- Scroll to the bottom and choose between send to student only or parents and student
Related Articles


